Breadth Indicators

Cumulative Intraday Volume with Long/Short LabelsThis indicator calculates a running total of volume for each trading day, then shows on the price chart when that total crosses levels you choose. Every day at 6:00 PM Eastern Time, the total goes back to zero so it always reflects only the current day’s activity. From that moment on, each time a new candle appears the indicator looks at whether the candle closed higher than it opened or lower. If it closed higher, the candle’s volume is added to the running total; if it closed lower, the same volume amount is subtracted. As a result, the total becomes positive when buyers have dominated so far today and negative when sellers have dominated.
Because futures markets close at 6 PM ET, the running total resets exactly then, mirroring the way most intraday traders think in terms of a single session. Throughout the day, you will see this running total move up or down according to whether more volume is happening on green or red candles. Once the total goes above a number you specify (for example, one hundred thousand contracts), the indicator will place a small “Long” label at that candle on the main price chart to let you know buying pressure has reached that level. Similarly, once the total goes below a negative number you choose (for example, minus one hundred thousand), a “Short” label will appear at that candle to signal that selling pressure has reached your chosen threshold. You can set these threshold numbers to whatever makes sense for your trading style or the market you follow.
Because raw volume alone never turns negative, this design uses candle direction as a sign. Green candles (where the close is higher than the open) add volume, and red candles (where the close is lower than the open) subtract volume. Summing those signed volume values tells you in a single number whether buying or selling has been stronger so far today. That number resets every evening, so it does not carry over any buying or selling from previous sessions.
Once you have this indicator on your chart, you simply watch the “summed volume” line as it moves throughout the day. If it climbs past your long threshold, you know buyers are firmly in control and a long entry might make sense. If it falls past your short threshold, you know sellers are firmly in control and a short entry might make sense. In quieter markets or times of low volume, you might use a smaller threshold so that even modest buying or selling pressure will trigger a label. During very active periods, a larger threshold will prevent too many signals when volume spikes frequently.
This approach is straightforward but can be surprisingly powerful. It does not rely on complex formulas or hidden statistical measures. Instead, it simply adds and subtracts daily volume based on candle color, then alerts you when that total reaches levels you care about. Over several years of historical testing, this formula has shown an ability to highlight moments when intraday sentiment shifts decisively from buyers to sellers or vice versa. Because the indicator resets every day at 6 PM, it always reflects only today’s sentiment and remains easy to interpret without carrying over past data. You can use it on any intraday timeframe, but it works especially well on five-minute or fifteen-minute charts for futures contracts.
If you want a clear gauge of whether buyers or sellers are dominating in real time, and you prefer a rule-based method rather than a complex model, this indicator gives you exactly that. It shows net buying or selling pressure at a glance, resets each session like most intraday traders do, and marks the moments when that pressure crosses the levels you decide are important. By combining a daily reset with signed volume, you get a single number that tells you precisely what the crowd is doing at any given moment, without any of the guesswork or hidden calculations that more complicated indicators often carry.

Sniper vX∞.2.M.1 — Elite UX EditionThis is part 2z
add to part one
They make it complete
This is dicription that’s needed

BBS – Bond Breadth Signal"When bonds scream, breadth collapses, and fear spikes — BBS listens."
🧠 BBS – Bond Breadth Signal
A reversal timing tool built on macro conviction, not price noise.
The Bond Breadth Signal (BBS) was developed to identify major market inflection points by combining four key market stress indicators:
1) 10-Year Yield ROC – Measures sharp moves in the bond market
2) Z-Score of the 10Y – Captures statistical extremes
3) NSHF (Net Highs–Lows) – Signals internal market strength or weakness
4) TLT ROC + VIX – Confirmations of flight to safety and volatility-driven fear
When all conditions align, BBS marks either a For-Sure Buy or For-Sure Sell — these are rare, high-confidence signals designed to cut through noise and focus on true market dislocations.
🔧 Features:
-Background color and signal arrows on confirmation days
-Signals remain visually active for 3 days for added clarity
-Fully adjustable thresholds and alert toggles
-Plot panel for yield, TLT, NSHF, VIX, and Z-score visuals
This tool isn’t designed to fire every day. It’s meant to wait for those moments when the market truly bends — not just wiggles.
Best used on major indices (SPY, QQQ, IWM) to assess macro turning points.
EMA PPO StratejisiA great strategy for those who want to make money. Sell when the price breaks the EMA 175 line down, A signals strategy that generates Strategic Trading based on the price indicator and temperature and EMA 400

💩 W$J Meme Index 🧻The official W$J Meme Index — a custom-built, market cap–weighted index tracking the top 14 meme coins in real time.
This indicator calculates the percent change from each coin’s initial price, applies a weight based on estimated market cap dominance, and combines them into a single index that starts at 100.
Coins included: DOGE, SHIB, PEPE, WIF, BONK, FLOKI, BOME, MEME, MYRO, TOSHI, SPX6900, MOG, GIGA, and POPCAT.
Designed by Wall Shit Journal for maximum degeneracy and absolute transparency.
💩 Degens Business. Trust the Index.
This index is weighted. Not fair. Not equal. Just like life.

Smart Grid Levels - Based on High/LowSmart Fibo
- Calculation of Key Levels:
- Finds the highest and lowest price within the lookbackBars range.
- Computes the price difference (diff) between the high and low.
- Determines the step size (step) by dividing diff by levels, creating evenly spaced grid levels.
- Drawing the Grid Levels:
- A loop (for i = 0 to levels) iterates through the number of levels.
- Each level is calculated based on the lowest price plus increments of step.
- Horizontal lines (line.new) are drawn at each level and extended rightward.
- If showLabels is enabled, price labels are placed at each level.
Usage in Trading :
- Helps identify support and resistance zones based on price range.
- Useful for grid trading strategies, where traders buy near lower levels and sell near higher ones.
- Provides a structured view of price movement without relying on traditional indicators.

TPG Trend + MACDUser Guide for "TPG Trend + MACD"
Author: TrungChuThanh
🔎 Main Functions
The TPG Trend + MACD indicator is a combined tool that integrates:
TPG Trend Histogram (spread between fast and slow EMA)
MACD Line & Signal for confirming trend momentum
Buy/Sell signals displayed directly on the indicator panel
⚙️ Components and Meaning
1️⃣ TPG Trend Histogram
Calculated from the difference between Fast EMA (9) and Slow EMA (26).
Light gray bars = bullish trend (spread > 0)
Dark gray bars = bearish trend (spread < 0)
Signal triggers:
B1 (green label): Crossover above 0 → Buy signal
S1 (red label): Crossunder below 0 → Sell signal
2️⃣ MACD Line & Signal
Consists of:
MACD Line = EMA(12) – EMA(26)
Signal Line = EMA(9) of the MACD Line
Confirmation signals:
B2 (blue triangle): MACD crosses above Signal → Buy confirmation
S2 (orange triangle): MACD crosses below Signal → Sell confirmation
MACD Line: Blue
Signal Line: Orange
📌 How to Use
Determine the main trend using the TPG Histogram
→ When the histogram crosses above zero → Consider Buy
→ When it crosses below zero → Consider Sell
Use MACD to confirm trend direction or optimize entry timing
✅ Prefer signals when both TPG and MACD align (e.g., B1 + B2 or S1 + S2)
⚠️ Avoid using the indicator alone; combine with support/resistance, RSI, volume, or other tools for higher accuracy
🛠️ Adjustable Parameters
Fast/Slow EMA for TPG Trend
Fast/Slow/Signal for MACD
Toggle to show/hide TPG and MACD elements in the panel
⚠️ Notes
This is a technical analysis tool, not investment advice
Always apply risk management, set clear stop-loss, and confirm signals across multiple timeframes


EMA flow trend buy AnhDuong🎯 1. Indicator Purpose
This indicator combines:
BUY/SELL signals based on crossovers between EMA and LWMA (with some noise filtering).
A multi-timeframe dashboard (M1 → H4) showing trend direction using EMA34 and EMA89.
📈 2. Crossover Signal Logic
BUY signal occurs when:
text
Sao chép
Chỉnh sửa
EMA89 < EMA34 (Bullish crossover)
LWMA45 > EMA34 (Price is rising above the fast EMA)
LWMA45 < EMA89 (Price hasn't broken the long EMA yet)
➡️ Meaning: A bullish move is forming (early stage) → potential entry point.
SELL signal occurs when:
text
Sao chép
Chỉnh sửa
EMA89 > EMA34 (Bearish crossover)
LWMA45 < EMA34 (Price is below the fast EMA)
LWMA45 > EMA89 (Price hasn't broken the long EMA downward)
➡️ Meaning: A bearish move is forming → possible short setup.
📊 3. Multi-Timeframe Dashboard
This dashboard shows trend direction using EMA34 vs EMA89:
UP: EMA34 > EMA89 → uptrend
DOWN: EMA34 < EMA89 → downtrend
Example:
makefile
Sao chép
Chỉnh sửa
DASHBOARD (EMA34/89)
M1: DOWN
M5: DOWN
M15: UP
H1: UP
H4: UP
🟢 Recommended strategy:
BUY when most timeframes show UP
SELL when most timeframes show DOWN
Avoid trades if the trend is mixed (e.g., M1 says UP but H1 says DOWN)
📌 4. Suggested Strategy
For Scalping (e.g., on M5):
Ensure that H1 and H4 are aligned with your direction.
Wait for a BUY/SELL signal on M5.
Check the Dashboard to confirm higher-timeframe trend agreement.
⚠️ 5. Important Notes
Don’t rely solely on BUY/SELL signals — always confirm with the Dashboard.
Consider adding RSI, Bollinger Bands, or SMC levels to improve filtering.
Avoid trading during choppy or sideways conditions — frequent EMA crossovers = many false signals.

Retail SMFI _ StrategicVault-999Alright, real talk: this is my Retail SMFI — a mashup of volume and price action designed to sniff out when retail traders might be crowding in or out (overbought or oversold zones).
Just kidding… or am I? 😉
What’s going on here?
I took a simple idea: if price and volume move together, the trend might be strong; if they’re out of sync, maybe a reversal’s brewing.
So, I smoothed the price and volume with a 21-period EMA each, then checked how closely they correlate over the last 14 bars. Multiply that by 100 and boom — you get SMFI, a handy signal telling you when the crowd might be pushing too far.
What to expect on your chart:
SMFI line in green when price and volume agree (bullish vibes)
SMFI line in red when they disagree (watch out!)
Clear overbought (default 50) and oversold (-50) lines, so you know when things are getting spicy.
Background flashes red or green in those extreme zones — can’t miss ‘em!
Alerts ready to ping you when SMFI hits those levels. Perfect if you don’t want to stare at the screen all day.
Should you trust it?
Well… it’s a simple but solid tool to catch when retail crowd behavior might be peaking or bottoming out. Not magic, but it’s got your back when combined with other indicators or your own smarts.
If you like this kind of no-nonsense volume+price combo, you’re gonna love it. If not, hey, blame me — but maybe give it a try first? 😄
In short:
I made this for fun — but it’s surprisingly useful.
Use it wisely, don’t blindly follow it, and maybe you’ll catch some juicy reversals.
Need it tweaked? Hit me up!
And hey, if you find a bug, that’s on me too. Just kidding, mostly. 😅

VIDYA (Chande)This script brings you VIDYA – the Variable Index Dynamic Average, developed by Tushar Chande. It’s not your typical moving average. Unlike the standard SMA or EMA, VIDYA adapts its speed and smoothness based on real-time market momentum using the Chande Momentum Oscillator (CMO).
Think of it like a moving average that gets faster during strong trends and slows down during sideways or choppy markets — just like how a smart trader would!
🧠 What Makes VIDYA Different?
Traditional moving averages use fixed smoothing, so they lag more during big moves or chop during weak trends.
VIDYA fixes that by adapting its behavior dynamically:
When momentum is strong → VIDYA reacts faster 🚀
When momentum is weak → VIDYA smooths out the noise 🧘
⚙️ How It Works (Explained Simply):
1️⃣ CMO Calculation (Chande Momentum Oscillator):
We look at the past cmoLength candles (default 9) and:
i) Add up all the positive price changes (gains)
ii) Add up all the negative price changes (losses)
iii) Use those to compute a normalized momentum score between -100 and +100
📌 CMO = (Gains - Losses) / (Gains + Losses)
• This gives us a momentum reading that powers the next step.
2️⃣ Dynamic Alpha Smoothing:
• We convert the absolute value of the CMO into an alpha — this is the "speed" of the VIDYA.
📌 Higher momentum = higher alpha → faster response
📌 Lower momentum = lower alpha → smoother behavior
3️⃣ VIDYA Formula:
• Finally, we apply the smoothing:
📌 VIDYA = α × Price + (1 - α) × Previous VIDYA
• This equation continuously adapts to market behavior — trending or ranging.
📊 What’s Plotted?
🟠 The VIDYA Line:
A smooth, responsive line plotted on your price chart that adjusts in real-time with price momentum.
🔎 How to Use It:
✅ Use it like a moving average, but smarter:
• Price > VIDYA and rising → Trend is likely up
• Price < VIDYA and falling → Trend is likely down
• Flat VIDYA = Possible consolidation or sideways market
✅ Combine with:
• Breakout strategies (VIDYA confirms momentum)
• Reversal entries (look for price crossing VIDYA)
• Volatility filters (ignore signals when VIDYA flattens)
🧪 Bonus Tip:
Pair this with a volume indicator (like my Volume Confirmation Bars or Volume Strength Highlight) to confirm whether momentum is backed by real participation or just a fakeout.
📩 Want alerts, dual-timeframe overlays, or VIDYA with other base inputs (like typical price or HLC3)? Let me know — happy to expand this for your setup!
Stay adaptive, not reactive — trade smarter with VIDYA! 🧠📉📈

Anchored VWAP fastEMA $TICK RVOL ADD SQZ by RMAnchored VWAP fastEMA USI:TICK RVOL ADD SQZ short name is VTARS Model.
The 'VTARS Model by RM' indicator combines several indicators in one, with customizable location settings for the graphs.
VTARS Model Stands for: VWAP, Tick, ADD, RVOL and SQZ.
The Advance Decline Indicator (ADD) measures market breadth by comparing the number of advancing and declining stocks within an index or exchange.
It helps traders assess overall market strength or weakness, confirming trends or signaling potential reversals.
A rising line suggests broad market participation in a rally, while a falling line indicates widespread selling pressure.
This tool is especially useful when used alongside price action and volume indicators for a more complete market analysis.
The Tick Indicator measures the net number of stocks trading on an uptick versus a downtick on a specific exchange, typically the NYSE.
A positive tick value indicates more stocks are trading on upticks (buying pressure), while a negative value shows more downticks (selling pressure).
It’s a real-time market sentiment gauge, often used by day traders to spot intraday strength, weakness, or potential reversals.
Extreme tick readings can signal overbought or oversold conditions.
The Relative Volume (RVOL) Indicator compares a stock's current trading volume to its average volume over a specified period.
It helps identify unusual trading activity and potential trading opportunities.
An RVOL greater than 1 indicates higher-than-normal volume, often signaling increased interest or momentum.
RVOL is widely used by traders to confirm breakouts, validate price moves, and spot high-interest setups.
The VWAP (Volume Weighted Average Price) is a benchmark indicator that shows the average price of an asset, weighted by volume.
It helps traders identify the true average price paid for a security and is widely used for intraday trading.
Price above VWAP suggests bullish sentiment, while price below VWAP indicates bearish sentiment.
VWAP is commonly used for trade entries, exits, and assessing market trend strength.
The Anchored VWAP is a variation that allows the user to set the starting time for calculations.
The Bollinger Bands and Keltner Channels Squeeze Indicator (SQZ) identifies periods of low volatility that often precede major price moves.
The "squeeze" conditions happen when the Bollinger Bands contract inside the Keltner Channels.
This signals consolidation as yellow dots in the graph and potential breakout zones as Up/Dn labels.
When the squeeze ends it indicates increasing volatility and a likely directional move
Traders use this tool to anticipate breakouts and plan entries based on momentum shifts.
9 EMA and VWAP interaction identified by periods of expansion and contraction can be used to identify suitable trade entries.
4 EMA can be used in scalping 1 minute charts for quick entries in combination with Tick, ADD and RVOL.
Disclaimer: The VTARS Model is not a Financial tool, it cannot used as any kind of advice to invest or risk moneys in any market,
Markets are volatile in nature - with little or no warning - and will drain your account if you are not careful.
Use only as an academic demonstrator => * Use it at your own risk *

Support Resistance StrategyThis Pine Script (version 5) implements the "Support Resistance Strategy," adapted from the original indicator by TradingView user @LonesomeTheBlue The strategy identifies support and resistance levels based on pivot points and executes trades when the price breaks these levels, incorporating a 0.1% commission per trade and percentage-based stop loss and take profit mechanisms for risk management.
Strategy Overview
The strategy generates long trades when the price breaks above a resistance level and short trades when it breaks below a support level.
It accounts for trading costs with a configurable 0.1% commission per trade.
Stop loss and take profit levels are set as percentages of the entry price to manage risk.
Only one position (long or short) can be open at a time to avoid excessive orders.
Key Inputs
Pivot Period (prd): Defines the lookback period for detecting pivot highs and lows (default: 10 bars).
Source (ppsrc): Allows selection between High/Low or Close/Open for pivot calculations (default: High/Low).
Maximum Channel Width % (ChannelW): Limits the width of support/resistance channels as a percentage of the 300-bar price range (default: 5%).
Minimum Strength (minstrength): Specifies the minimum number of pivot points required to form a valid support/resistance channel (default: 0).
Maximum Number of S/R (maxnumsr): Caps the number of support/resistance channels displayed (default: 6).
Loopback Period (loopback): Sets the timeframe for analyzing pivots to calculate support/resistance levels (default: 290 bars).
Stop Loss % (sl_percent): Defines the stop loss as a percentage below/above the entry price (default: 2%).
Take Profit % (tp_percent): Defines the take profit as a percentage above/below the entry price (default: 4%).
Moving Averages: Optional 50-period and 200-period SMA or EMA for trend context (disabled by default).
Colors: Configurable colors for resistance (red), support (lime), and price within a channel (gray).
Extras: Options to display pivot points (showpp) and broken support/resistance levels (showsrbroken).
How It Works
Pivot Detection: Identifies pivot highs and lows using the ta.pivothigh and ta.pivotlow functions, based on the selected source (High/Low or Close/Open).
Support/Resistance Channels: Groups pivot points within a maximum channel width (calculated as a percentage of the 300-bar range) to form support and resistance zones. Channels are sorted by strength, determined by the number of pivot points and price interactions within the channel.
Breakout Signals:
Long Entry: Triggered when the price closes above a resistance level (resistancebroken condition) and no position is currently open.
Short Entry: Triggered when the price closes below a support level (supportbroken condition) and no position is currently open.
Trade Exits: Each trade has a stop loss (sl_percent) and take profit (tp_percent) calculated relative to the entry price. Exits occur only when a position is open, and the position is closed before a new entry is allowed.
Commission: A 0.1% commission is applied per trade, adjustable via the commission_value parameter.
Visual Indicators
Support and resistance channels are displayed as colored boxes (red for resistance, lime for support, gray when the price is within a channel).
Pivot points, if enabled, are shown as "H" (high) or "L" (low) labels on the chart.
Breakout signals are marked with green triangles for resistance breaks and red triangles for support breaks when showsrbroken is enabled.
Debug labels ("R Break" for resistance, "S Break" for support) are added to confirm breakout detection.
Optional moving averages (50-period and 200-period) can be plotted to provide trend context.
Alerts
Resistance Broken: Triggers when the price breaks above a resistance level, signaling a potential long entry.
Support Broken: Triggers when the price breaks below a support level, signaling a potential short entry.
Usage Guidelines
Backtesting: Utilize TradingView’s Strategy Tester to evaluate the strategy’s performance on your chosen asset and timeframe. Adjust parameters such as prd, ChannelW, sl_percent, and tp_percent to optimize results.
Commission: Set commission_value to match your broker’s fee structure (e.g., 0.1% is typical for cryptocurrency exchanges like Binance).
Risk Management: The default settings provide a 1:2 risk-reward ratio (2% stop loss, 4% take profit). Modify these based on your risk tolerance and market conditions.
Market Suitability: The strategy performs best in markets with clear support and resistance levels, such as trending or range-bound markets. Test on assets like stocks, forex, or cryptocurrencies.
False Breakouts: Breakout signals may be prone to noise. Consider adding filters, such as moving average trend confirmation, to reduce false entries.
How to Implement in TradingView
Copy the script into the TradingView Pine Editor.
Click "Add to Chart" to apply the strategy.
Adjust input parameters in the Settings panel to suit your asset and timeframe.
Use the Strategy Tester to analyze performance metrics, including net profit, drawdown, and win rate.
Configure alerts for "Resistance Broken" or "Support Broken" to receive real-time notifications.
Disclaimer
This strategy is adapted from the original indicator by @This Pine Script (version 5) implements the "Support Resistance Strategy," adapted from the original indicator by TradingView user LonesomeTheBlue. The strategy identifies support and resistance levels based on pivot points and executes trades when the price breaks these levels, incorporating a 0.1% commission per trade and percentage-based stop loss and take profit mechanisms for risk management. It ensures only one position is open at a time to prevent excessive order generation. Below is a professional, structured explanation for TradingView users.
Strategy Overview
The strategy generates long trades when the price breaks above a resistance level and short trades when it breaks below a support level.
It accounts for trading costs with a configurable 0.1% commission per trade.
Stop loss and take profit levels are set as percentages of the entry price to manage risk.
Only one position (long or short) can be open at a time to avoid excessive orders.
Key Inputs
Pivot Period (prd): Defines the lookback period for detecting pivot highs and lows (default: 10 bars).
Source (ppsrc): Allows selection between High/Low or Close/Open for pivot calculations (default: High/Low).
Maximum Channel Width % (ChannelW): Limits the width of support/resistance channels as a percentage of the 300-bar price range (default: 5%).
Minimum Strength (minstrength): Specifies the minimum number of pivot points required to form a valid support/resistance channel (default: 0).
Maximum Number of S/R (maxnumsr): Caps the number of support/resistance channels displayed (default: 6).
Loopback Period (loopback): Sets the timeframe for analyzing pivots to calculate support/resistance levels (default: 290 bars).
Stop Loss % (sl_percent): Defines the stop loss as a percentage below/above the entry price (default: 2%).
Take Profit % (tp_percent): Defines the take profit as a percentage above/below the entry price (default: 4%).
Moving Averages: Optional 50-period and 200-period SMA or EMA for trend context (disabled by default).
Colors: Configurable colors for resistance (red), support (lime), and price within a channel (gray).
Extras: Options to display pivot points (showpp) and broken support/resistance levels (showsrbroken).
How It Works
Pivot Detection: Identifies pivot highs and lows using the ta.pivothigh and ta.pivotlow functions, based on the selected source (High/Low or Close/Open).
Support/Resistance Channels: Groups pivot points within a maximum channel width (calculated as a percentage of the 300-bar range) to form support and resistance zones. Channels are sorted by strength, determined by the number of pivot points and price interactions within the channel.
Breakout Signals:
Long Entry: Triggered when the price closes above a resistance level (resistancebroken condition) and no position is currently open.
Short Entry: Triggered when the price closes below a support level (supportbroken condition) and no position is currently open.
Trade Exits: Each trade has a stop loss (sl_percent) and take profit (tp_percent) calculated relative to the entry price. Exits occur only when a position is open, and the position is closed before a new entry is allowed.
Commission: A 0.1% commission is applied per trade, adjustable via the commission_value parameter.
Visual Indicators
Support and resistance channels are displayed as colored boxes (red for resistance, lime for support, gray when the price is within a channel).
Pivot points, if enabled, are shown as "H" (high) or "L" (low) labels on the chart.
Breakout signals are marked with green triangles for resistance breaks and red triangles for support breaks when showsrbroken is enabled.
Debug labels ("R Break" for resistance, "S Break" for support) are added to confirm breakout detection.
Optional moving averages (50-period and 200-period) can be plotted to provide trend context.
Alerts
Resistance Broken: Triggers when the price breaks above a resistance level, signaling a potential long entry.
Support Broken: Triggers when the price breaks below a support level, signaling a potential short entry.
Usage Guidelines
Backtesting: Utilize TradingView’s Strategy Tester to evaluate the strategy’s performance on your chosen asset and timeframe. Adjust parameters such as prd, ChannelW, sl_percent, and tp_percent to optimize results.
Commission: Set commission_value to match your broker’s fee structure (e.g., 0.1% is typical for cryptocurrency exchanges like Binance).
Risk Management: The default settings provide a 1:2 risk-reward ratio (2% stop loss, 4% take profit). Modify these based on your risk tolerance and market conditions.
Market Suitability: The strategy performs best in markets with clear support and resistance levels, such as trending or range-bound markets. Test on assets like stocks, forex, or cryptocurrencies.
False Breakouts: Breakout signals may be prone to noise. Consider adding filters, such as moving average trend confirmation, to reduce false entries.
How to Implement in TradingView
Copy the script into the TradingView Pine Editor.
Click "Add to Chart" to apply the strategy.
Adjust input parameters in the Settings panel to suit your asset and timeframe.
Use the Strategy Tester to analyze performance metrics, including net profit, drawdown, and win rate.
Configure alerts for "Resistance Broken" or "Support Broken" to receive real-time notifications.
Disclaimer
This strategy is adapted from the original indicator by @LonesomeTheBlue with modifications to include commission, stop loss, take profit features, and order limit controls. Trading involves significant financial risks, and past performance is not indicative of future results. No trading strategy, including this one, guarantees profits. Users must thoroughly backtest and forward-test the strategy on TradingView before deploying it in live trading. Performance depends on the asset, timeframe, and market conditions. The author assumes no responsibility for any financial losses incurred. Consult a qualified financial advisor before engaging in trading activities., with modifications to include commission, stop loss, take profit features, and order limit controls. Trading involves significant financial risks, and past performance is not indicative of future results. No trading strategy, including this one, guarantees profits. Users must thoroughly backtest and forward-test the strategy on TradingView before deploying it in live trading. Performance depends on the asset, timeframe, and market conditions. The author assumes no responsibility for any financial losses incurred. Consult a qualified financial advisor before engaging in trading activities.

Rifaat Ultra Gold AI v6.1🔄 SL moves with each new candle if the price moves in favor of the trade.
🟢 Break-Even Protection
If a certain profit percentage is reached, the SL is moved to the entry point (zero loss).
🔕 Audio and Visual Alerts
A sound notification on buy/sell signals.
A visual alert on the screen.
🎛️ Settings Control
Adjustable from the settings menu.

JS CandleIt is an excellent indicator for those who wish to earn. It is a strategic tool, but it is recommended to try it after thorough paper testing. Using a 5-minute or 3-minute chart, it provides suggestions for buying and selling. A complete description will be available after seven days.

LinReg Candle Strategy - Arrows at LinReg High/LowVisual Result:
✅ Arrows appear exactly at the smoothed candle low (buy) or high (sell)
✅ Still uses strategy entries (you can backtest)
✅ Clean layout with LinReg candles and EMAs

3-Min Buy/Sell Signal from 15-Min Linear RegressionShows Buy below the 3-min candle when all bullish conditions match.
Shows Sell above the 3-min candle when all bearish conditions match.
Fully customizable (EMA lengths, proximity %, and angle threshold).

Scalping RSI 1 Min con TP/SL y SalidasActualizacion de Scalping de temporalidad de 1min -Julio- 05-31-25

CBC Flip StrategyCBC Flip Strategy is a trend-following strategy inspired by the price action logic originally shared by the TradingView user @AsiaRoo This implementation formalizes the concept into a complete and backtestable framework with optional trend filtering and commission simulation.
Strategy Overview
The core idea is to capture directional shifts in market structure based on simple breakout conditions:
A bullish flip is defined when the current candle closes above the high of the previous candle.
A bearish flip is defined when the current candle closes below the low of the previous candle.
The strategy can optionally filter trades based on a 200-period Exponential Moving Average (EMA200):
Long trades are taken only when the price is above EMA200.
Short trades are taken only when the price is below EMA200.
Each entry is paired with a configurable Take Profit and Stop Loss, defined as a percentage of the entry price.
The script also supports commission modeling using either a percentage or fixed cash value.
User Inputs
Take Profit % – Sets the target profit level per trade.
Stop Loss % – Sets the maximum acceptable loss per trade.
Use EMA200 Filter – Enables/disables the trend direction filter.
Commission Type & Value – Simulates broker commissions to enhance backtest accuracy.
Visual Indicators
Green upward triangles mark bullish flips.
Red downward triangles mark bearish flips.
Yellow and blue background highlights indicate new bullish or bearish flips, respectively.
Attribution
This strategy is based on an idea originally shared by TradingView user AsiaRoo. The implementation here is a refined and extended version with added risk management and backtesting features.
Disclaimer
This script is provided for educational and informational purposes only. It does not constitute financial, investment, or trading advice. The strategy presented here is a tool to support analysis and learning, and should not be interpreted as a recommendation to buy or sell any security or financial instrument.
Trading involves substantial risk and may not be suitable for all investors. Users are solely responsible for their own trading decisions and for evaluating the suitability of this tool. Past performance is not indicative of future results.
Always conduct thorough backtesting and risk assessment before using any strategy in live trading environments.

MACD + RSI (MACD to rõ, tách riêng)là sự kết hợp giữa 2 chỉ báo rsi và macd giúp mọi người tiết kiệm chỉ báo hơn


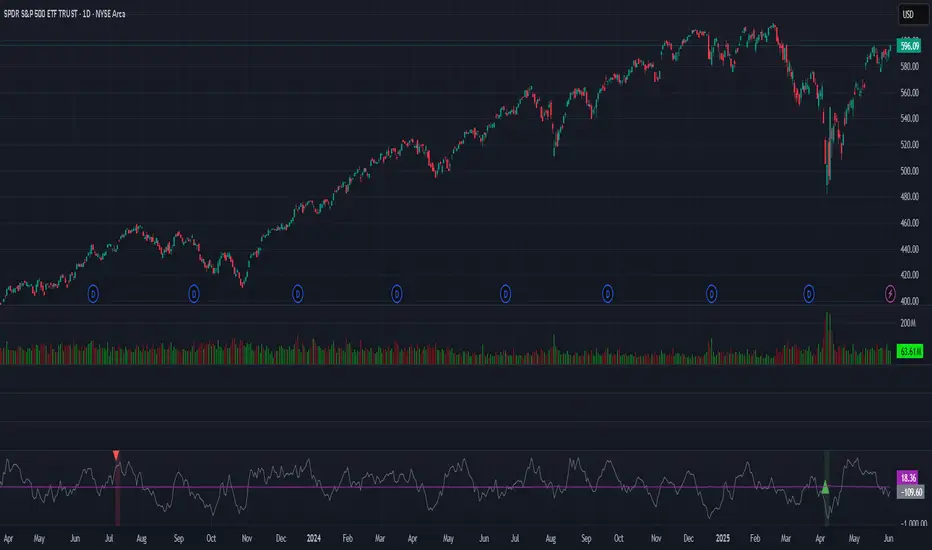
Daily S&P BreadthS&P breadth
measures stock percentages against their moving averages
5, 20, 50, 200

45 Second Futures Session Open RangeThis indicator plots the 45-second Opening Range Breakout (ORB) for futures, allowing users to select a specific trading session (Asia, Europe, or NY) to display on the chart. It visualizes the high, low, and midpoint of the opening range for the chosen session and includes dynamic price targets for breakout trading strategies.
Key Features:
Customizable Session Selection: Choose between Asia (17:00), Europe (2:00), or NY (8:30) sessions (Chicago time) to display only the relevant ORB levels.
45-Second Timeframe: Captures the high and low of the first 45 seconds of the selected session using request.security_lower_tf.
Visualized ORB Levels: Plots the high, low, and midpoint lines with session-specific colors:
Asia: Orange (high/low), Fuchsia (mid)
Europe: Olive (high/low), Lime (mid)
NY: Aqua (high/low), Yellow (mid)
Dynamic Price Targets: Draws breakout target lines above or below the ORB when price exceeds the range, with customizable percentage, color, style, and width.
Debug Labels: Displays warnings if the 45-second timeframe is unsupported or no valid ORB data is available for the selected session.
How It Works:
The indicator fetches 45-second high and low data at the start of the selected session (e.g., 8:30:00 for NY).
It plots the ORB high, low, and midpoint as step lines, with labels showing price values.
Price targets are drawn as horizontal lines when the price breaks above the ORB high or below the ORB low, based on a user-defined percentage of the ORB width.
Targets reset at the start of each new session.
Settings:
Select Session: Choose "Asia", "Europe", or "NY" to display the corresponding ORB.
Display Targets: Toggle price target lines on or off.
Target %: Set the percentage of the ORB width for target levels (default: 50%).
Target Color: Customize the color of target lines (default: silver).
Target Style: Select solid, dashed, dotted, or none for target line style.
Target Width: Adjust the thickness of target lines (default: 1).
Usage Tips:
Best for Futures: Optimized for futures contracts like ES (S&P 500 futures) that support lower timeframes.
Check Timeframe Support: The 45-second timeframe is non-standard. If no lines appear, a red debug label will indicate if the timeframe is unsupported. Consider using a premium TradingView plan or a supported symbol.
Timezone Alignment: Ensure your chart’s data aligns with Chicago time (America/Chicago) for accurate session timing (Asia: 17:00, Europe: 2:00, NY: 8:30).
Scaling: Adjust chart scaling if lines are off-screen due to large price ranges.
Notes:
Requires Pine Script v6 and a TradingView plan supporting lower timeframes for 45-second data.
If the 45-second timeframe is unsupported, contact the author for a fallback version (e.g., 1-minute ORB).
Licensed under Mozilla Public License 2.0.
Happy trading!
